
Mr. G and I are couple of geeks -we both watch anime, read manga, and have in depth conversations about anything from X-Men to Sailor Moon. I wanted to incorporate a bit of that geekiness in to our wedding and I had two ideas:
1. Make a cake topper with my two favorite Archie Comic Characters -Betty and Jughead.
2. Incorporate Mr.G ‘s favorite anime character Justaway.
Justaway from the series Gintama Image via nicovideo.jp
I originally thought I could use my favorite characters as a cake topper.
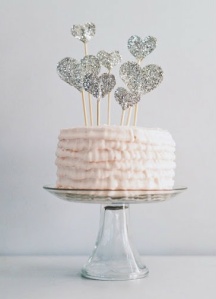
My DIY cake topper inspiration Image via thepaperpony.net Photography by Raya Carlisle
My plan was to make the silver cake toppers and just glue a picture of Jughead and Betty on the tallest hearts.
As for Justaway, I thought that I could make a Justaway card box by using lots of Styrofoam and spray paint. I soon found out that making a cylindrical card box would be way above my DIY skills. I scraped the card box idea and spent few weeks thinking of a way I could still incorporate Justaway. In the meantime, I discovered that the people who made our custom couple illustration also made cute cake toppers.
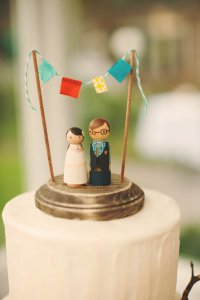
I just had to get these! Image via Etsy Shop Love Birds Goods
I figured that I would not only have to scrap Justaway, but also Betty and Jughead.
But wait! An awesome idea struck me when Mr. G and I started talking about our dessert bar- I could make a dessert banner incorporating Jughead, Betty, and Justaway.

My completed dessert bar banner
This DIY was pretty simple and only took a few hours.
First I started with the hearts. I went to a Japanese dollar store and picked up a bag of assorted foam hearts and silver sticker paper. I cut out squares of sticker paper that would be big enough to cover the entire heart. I then stuck the sticker on the heart and cut any execess paper of with scissors and an exacto knife. When I finished I taped a picture of Betty and Jughead. I later put the hearts on bamboo skewers.


I then layered squares of Styrofoam in the jars until it was 4/5 full. The Styrofoam I used was from packing material and I literally broke off chunks that were big enough to put in the vase.

I set the Styrofoam aside and turned those clear jars into glitter jars.
I then started on the banner. I Googled “banner template,” downloaded one that fit my sizing needs, and spelled out desserts. I put Justaway at the bottom of each letter. I then printed them out on card stock and used my hole puncher to punch two holes at the top. I found some twine that I had lying around and strung it through the letters. I started with D and strung all the letters on before cutting the string so I would be sure to have string leftover on both sides.

Lacing the banner letters
Phew, almost finished. I then started thinking about ways I could anchor the banner to Betty and Jughead’s hearts. I decide to hot glue the top of a loop of string on each heart. This way I could tie and untie the end of the banner string easily which would make it easier to transport.

After that, it was time to put everything all together. I put the Styrofoam into my newly made glitter jars, added white raffia paper on top, and stuck in the hearts.

I then tied the banner on to the loops behind the largest hearts and I was done!

This project was easy but it had lots of steps. I was pretty proud of myself once it was finished. Of course, this is not the classiest dessert banner, but it has me and Mr. G written all over it. Nonetheless, I’m pretty sure my mother will hate it. Who cares? If there is going to be any whimsy at a wedding it should be at a dessert bar right?!
How did you incorporate yourself into your wedding?
