DIY Glitter Jars

After I got engaged I spent some time on wedding websites such as Style Me Pretty, Elizabeth Ann Designs, and Love and Lavender looking for inspiration. I always found myself drawn to glittery and gold table scapes, but I always stopped myself.

This tablescape is gorgeous! Photo from marthastewertweddings.com

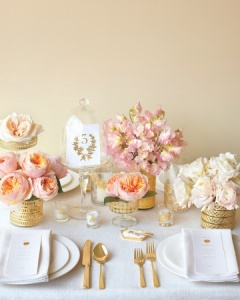
This tablescape is gorgeous! Image via marthastewertweddings.com   Photography by Castle in the Air

I had read somewhere that planning anything using gold or glitter should be left to the professionals. Do it wrong and what ever you make will end up looking horribly tacky or like a second grade craft project.

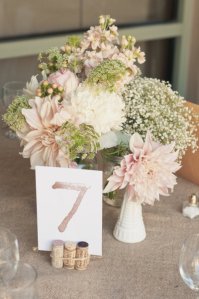
I decided to give up on my gold and glitter theme, but alas, the heart wants what the heart wants. I decided to compromise: the centerpieces for my Japanese wedding would be full of flowers (you can’t go wrong with flowers) with just a few hints of glitter and gold. Here are some pictures of my inspiration.

Beautiful hand painted gold jars Photo from weddingchicks.com

Beautiful hand painted gold jars
Image via weddingchicks.com Photography by MadebyJuvenia


Metallics and babies breath

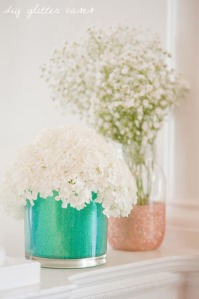
Metallics and babies breath- gorgeous! Image via weddingchicks.com/Photography by June Bug Company/ Event by Rent My Dust

Glitter!!

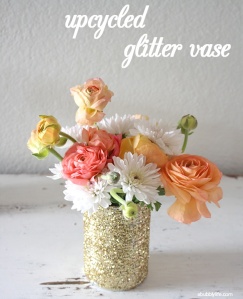
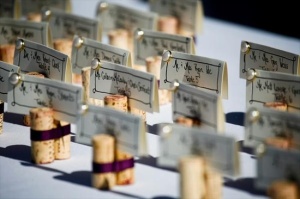
Glitter!! Image via abubblylife.com/ Photgraphy by Laurel Stavros

Step one in achieving my floral, glitter, and gold vision was a few glitter vases. I found a great tutorial at http://www.thesweetestoccasion.com.

These vases are gorgeous!

These vases are gorgeous! Image via the sweetestoccasion.com Photography by Alice G. Patterson

The tutorial on the original site is very easy to understand and I highly recommended you take a look. I will go over the way I did it as I changed a few things.

Supplies:

Mod Podge

Foam Brush

Paper

Drop Cloth

Glitter- I used Martha Stewart Crafts Essential Colors Glitter Set, 24-Pack

I chose these four out of the 24 pack of glitter

I chose these four out of the 24 pack of glitter

1. Lay out a drop cloth and few sheets of paper. The drop cloth is for the glitter that will get EVERYWHERE. The sheets of paper are for you to collect the excess glitter you shake out of the jar. You can use the paper to funnel the glitter back into the original container.

2. Coat the jar with Mod Podge using a foam brush. The original tutorial made it seem like the writer used long, broad strokes. I initially did it this way but my first jar came out a bit streaky as it was easy to see where the brush strokes started and ended. I suggest dabbing the jar all the way around with Mod Podge instead. Make sure it is even or else you will get areas that are not fully covered in glitter.

IMG_1486

3. Put glitter into the jar (I used about about 1/4 of the bottle). Rotate the jar to cover it with glitter.

IMG_1489IMG_1488

Cover the jar completely and let dry (getting the edges of the jar was quite difficult so I shook glitter on to the edges directly). I let my jars dry for a day. The next day I checked back and there were some places that weren’t completely covered with glitter so I gave them all a second coat and let them dry for another day.

IMG_1487 IMG_1491

They definitely need a second coat.

After a second coat of mod podge and glitter

After a second coat
of Mod Podge and glitter. I did not bother coating the bottom of the jars completely.

The next day I put one last coat of Mod Podge to seal the jars.

The copper glitter came out wonderfully!

The copper glitter came out wonderfully!

One day later, the mod podge had dried and they were complete!

IMG_1520

I am very happy with the way these came out. They were very easy to make and they will add that extra sparkle to the table, but it won”t be too overboard.

Are you afraid of working with glitter or do you love it?

DIY Cork Projects

Hello Hive, I just wanted to share a little something about myself- I love wine!

hhh

Drinking wine and feeling fine!

Mr. Gondola knows that I love wine so much he proposed to me at a winery. I knew that I definitely wanted a few wine related projects at my wedding and I am so lucky that the internet is full of them.

Top image via Hope Studios/ Photography by Jennifer Juniper Bottom Left image via  Etsy.com/ Shop: I Do Custom Events Bottom Right Image via greenweddingshoes.com/Photography by Katherine Elizabeth

Top image via Hope Studios/ Photography by Jennifer Juniper Bottom Left image via Etsy.com/ Shop: I Do Custom Events Bottom Right Image via greenweddingshoes.com/Photography by Katherine Elizabeth

I settled on two simple projects:

1. A cork stand to hold an informational card about Mr. Gondola and me for the American wedding

I love our custom illustration from lovebirdsgoods.com

I love our custom illustration from lovebirdsgoods.com!

2. Place card stands for the Japanese wedding.

IMG_1428

Both of these projects are extremely easy and all you need is a hot glue gun and some wine corks.

First I had to collect the wine corks. I saw that wine corks were sold pretty cheaply on Etsy but I figured I could save all the wine corks I used and ask my family to save all of theirs as well.

In about 5 months I saved about 16 wine corks.

My box of saved corks.

My box of saved corks.

My family, on the other hand, saved 100- literally 100.

IMG_1402

I first started with the cork stands.

My inspiration from  stylemepretty.com

My inspiration via 
stylemepretty.com / Photography by onelove photography

I first picked out corks that were all about the same height and weren’t too wobbly when placed upright. I then applied hot glue about 3/4 of the way up of the cork and glued two corks together.

IMG_1410

The higher you place the glue the higher your information card will stand. So if you want your card to fit deeply in the cork stand apply the glue about half way up.  I did three more pairs of corks until I had four pairs and then hot glued those all together to make the stand. This task took about 15 minutes.

IMG_1401

Be careful not to put to much hot glue on the corks. When you squeeze them together the glue will ooze out and harden. For the most part the glue is clear, but it can look white and become quite noticible.

I then started on the cork stands.  At first, I experimented with different methods to see which one would be the most stable. First I sawed a line into the cork and had the card sit in the groove, but the corks were too wobbly and would sometime fall down and I did not want to worry about falling corks on the day of the wedding.

I then tried hot gluing two corks with the place card standing in between, but not all of the corks I had were stable enough to stay upright.

My inspiration from  http://www.theknot.com

Two corks with the place card in between. Cute, but not very stable.
Image via www.theknot.com/ Event by Vineyard Setting

Then Mr. G had the great idea of laying the corks down and it worked like a charm! I pushed two corks together and hot glued the space in between.

IMG_1409

I turned the corks over and inserted the card. Viola, easy cork stand! I was shocked how quickly this project went. I completed 75 cork stands in 45 minutes.

I highly recommend these projects to anyone who wants to incorporate some wine related projects in their wedding.  It was super easy and fast and you get to see how truly gorgeous some wine corks are.

Aren't these gorgeous?!

Aren’t these gorgeous?!

Anyone using corks for their wedding?

DIY Fabric Jars

I was on Pinterest and found this cute project.

IMG_0086_sm3


I decided to give it a go! I did not have any liquid glue- the only glue I can find in Japan is stick glue, so I used Mod Podge instead.

I first got my materials ready:

1. Strips of fabric that were cut so they were the same height as the jar. I just eyeballed it when I cut the width.

Strips of fabric

Strips of fabric

Mod Podge

Paint Brush

Random jar that was lying around waiting to be recycled.


I first coated the entire jar in Mod Podge.

IMG_1194


Then I placed each strip of fabric inside the jar. I made sure they overlapped a bit so there would not be any cracks.

IMG_1197

I then painted Mod Podge on the back of the fabric to seal it in.

Placing Mod Podge on the back side of the fabric

Placing Mod Podge on the back side of the fabric


And that was it! I let it dry for two days- my apartment was very cold.

IMG_1196

The glass with wet Mod Podge

From beginning to end it took about 20 minutes for the project -excluding drying time of course!

Here is the finished project. (Note my awesome Archie comic book collection)

IMG_1214

From very close you can see where the fabric overlaps and it is not as smooth looking as the original tutorial’s picture. But from afar it looks just fine and I think I will make some more.


DIY Fabric Boards

One of the first DIY projects I completed were some cute fabric boards for my American wedding!

IMG_1210

I am in love with this fabric! It is the perfect shade of yellow and green.

This project was extremely easy.

Materials:

Cork Boards

Fabric

Batting

Staple Gun

Directions:

I cut out fabric and batting that was two inches larger (length and width-wise) than the cork board.

I placed the cork board on the fabric and stapled down the fabric lengthwise.

IMG_1189

This fabric piece size was a bit irregular so its much longer length-wise than the typical two inches extra.

I then folded down a corner of the fabric and batting into a triangle as if I was wrapping a present.

IMG_1193

and then the other corner

IMG_1190

then folded the top flap down

IMG_1191

and stapled it down.

IMG_1192

Voila- instant fabric board!

DSCF1112

This took me about 2 hours to do all. I ironed the fabric before I used it so it would not be wrinkly and that took a bit of time. I plan on pinning paper signs to the fabric boards and will use them for the guestbook and card box signs.

I am in love with my fabric boards!They were easy to make and I can use them after the wedding as well!

Do you have any easy DIY projects you have done or are working on?